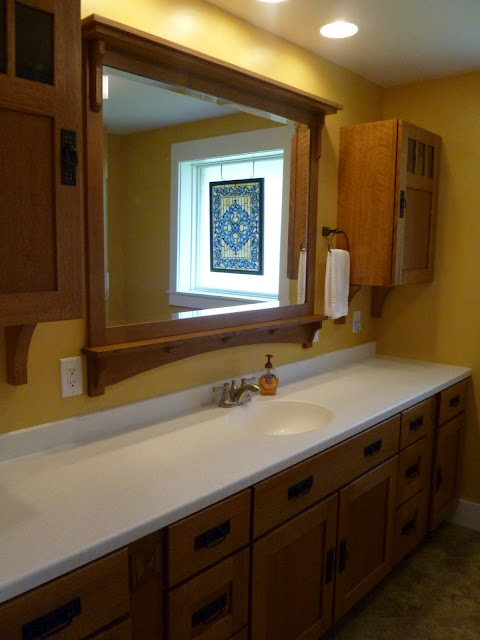
Finally, a few before-and-after photos to give you a sense of our remodeled main bath now that the work is complete. I encourage you to click on the photos so you can see more detail in the enlarged versions.
Before.
Before.
After. The new window seems larger than the old one even though it fit in the same hole in the wall. The glass area is bigger since this window has a fixed pane instead of the double hung design we had previously. Note: the ceiling light in the middle of the room is the same one we installed a few years ago, only mounted on a new ceiling!
Before.
After. Even though the mirror and the cabinets came from different sources, I think they match close enough for our purposes. Both are quarter sawn oak with similar finishes.
Before.
After. A new door to match the other doors in the house that have been replaced since we moved in. This shot also shows the new trim that matches the other trim in the house that was replaced before we moved in.
Before.
After. Everything is new in this shot including the plumbing behind the walls. We chose subway tile for the bottom courses, a chair rail, and harlequin tile for the top. You can see the tile shape a little more clearly in the enlarged view of the photo.
Before. Probably the most painful part of the project was throwing out this tile that we installed five years ago before we moved in.
After. One last shot of the cabinets, sink, mirror, and window. Call us what you like, we rather prefer the new bathroom to the old one.
(Previous posts on this project: part 1, part 2 and part 3).


We like the new bathroom too! You all did a great job. Great to see you tonight! Take care, the Whitakers :)
ReplyDeleteGorgeous! You all do nice work. I love the color choices too.
ReplyDeleteVictoria
Thanks for the kind comments, Whitakers and Victoria!
ReplyDeleteWow.. that is beautiful! I really adore the new cabinetry. It looks like vintage arts and crafts, which just so happens to be my fave style:) May I ask the paint color on the walls? It almost looks identical to the color we've just painted our front hall recently, Hawthorne Yellow. It makes me happy every time I look at it... gosh, I think I'll go take a peak at it right now!
ReplyDeleteThanks Diane. Our color is a combination of "Cup of Tea" and "Creamy Camel." As I described in the third post on this project, the "Cup of Tea" is the base coat and the final glaze coat, so it contributes most to the final effect.
ReplyDeleteI suppose I shouldn't be surprised that we would share similar cabinet and color tastes since we share similar tastes in other areas also!
OK.. you know what is driving me Kee-Razy?? I wrote "peak" instead of "peek"... I have left and come back a couple of times and since I can't edit, I am going to at least recomment to say that, yes, I know that isn't the correct spelling or word usage or whatevz, and yes, I know the difference between "peak" and "peek, and no, I am not in the least OCD! What would ever make you think such a thing?
ReplyDeleteahem.